Alerts
Create a market condition and manage its notifications.
Alerts watches configured market conditions and records notifications when they trigger. An alert does not place an order. Local alerts can be created without signing in; keep the application running and the required market-data connection available.
Create a price alert
- Open PANELS → Alerts. Click + at the right of the search box. Alternatively, right-click a Watchlist instrument and choose Create alert to prefill that listing.
- Give the alert a recognizable name. Check its symbol and provider, then select Market data → Last.
- Choose Crosses above, keep Value, and enter the level. The example uses 90,000 USDT for BTC; choose a level appropriate to your own observation.
- Leave Notify → Once for a single notification, review the message, and click Create alert. The saved rule appears in the list.
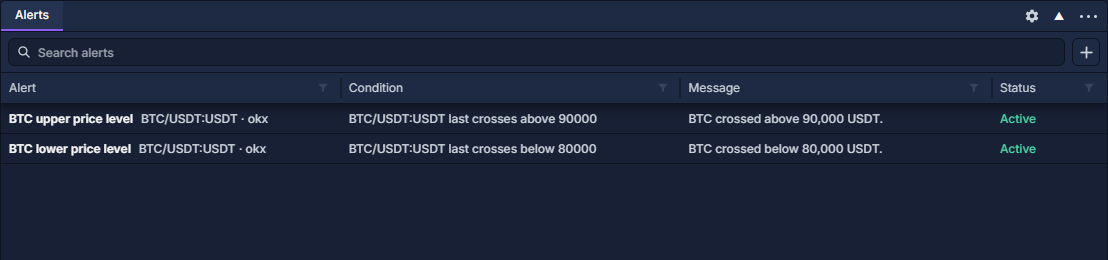
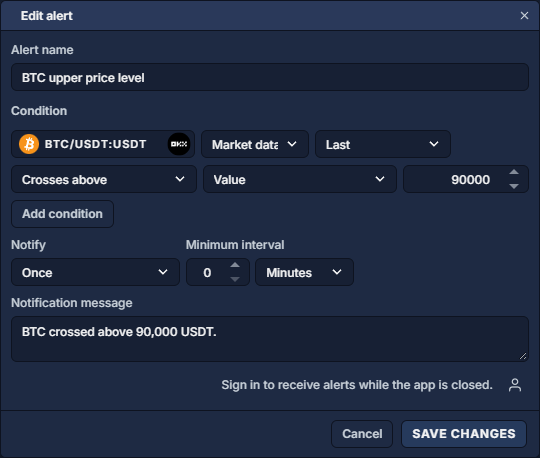
Greater than tests whether a value is above a level. Crosses above detects a transition through it, using a prior observation. This distinction matters when the price is already above your threshold at creation.
Choose conditions and repetition
Edit, pause and review
Search by name or source in the toolbar. Right-click a rule's row to choose Edit alert, Pause alert, Activate alert or Delete alert. Deletion asks for confirmation. Editing is a row-menu action, not a single click on its name.
After a rule has triggered, expand its row to inspect trigger times, messages, observed values and available delivery results. The Status column distinguishes active, paused and other lifecycle states.
The panel-header gear opens alert destination settings. Offline destinations require sign-in, a verified enabled destination and support for the chosen condition. Local delivery uses the application's notifications, inbox and sounds; Application settings explains Sounds. The screenshots use local example rules, without external delivery; they were paused after capture.
Connect a provider · Select and link instruments · Order Entry: prepare and review a ticket